Wednesday, February 11, 2015

Sunshine Observation Deck VR demo released!

You can now download the demo and try it for yourself [Requires Oculus Rift DK-2]. Here's a youtube clip to give you a taste:


There's more info here on the Oculus Dev Forum post. And here's a download link to the builds if you want to jump in:

OSX:
https://www.dropbox.com/sh/ptsph0fkn0r3yob/AABQfls0b3SY2s92KeP9nFQma?dl=0

Win7/8: Note: This demo runs great in win7, I've not tested in win8 however.
https://www.dropbox.com/sh/s9gpcjt67phby5z/AACt8otcG3wwwxg2kFC1g5Rya?dl=0

Time to start thinking about the next project. This time a Unity5 VR test of the real time global illumination capabilities of Enlighten from Geomerics.

-j

Friday, January 16, 2015

Transparency and deferred rendering are a bad combo, plus a mysterious lady appears?

Merry Christmas and a Happy New Year to you. Hope you had some time off and a relaxing break. I certainly did while playing a lot of BlazeRush with my kids. BlazeRush has a solid frame rate, excellent effects, great feeling dynamics and it's easy to play. The devs just added some of the best VR support I've seen in a commercial title too. It's great value for money on Steam, go get it.

This post will cover my discoveries about the difference between deferred rendering and forward rendering in Unity and how alpha transparencies forced me to learn a thing or two, plus some screen shots of where the sunshine observation deck is at. Things are nearing the time when I'll release it to the community as I'm itching to start another idea I had. It's a bit technical, but there's nice pictures at the end.

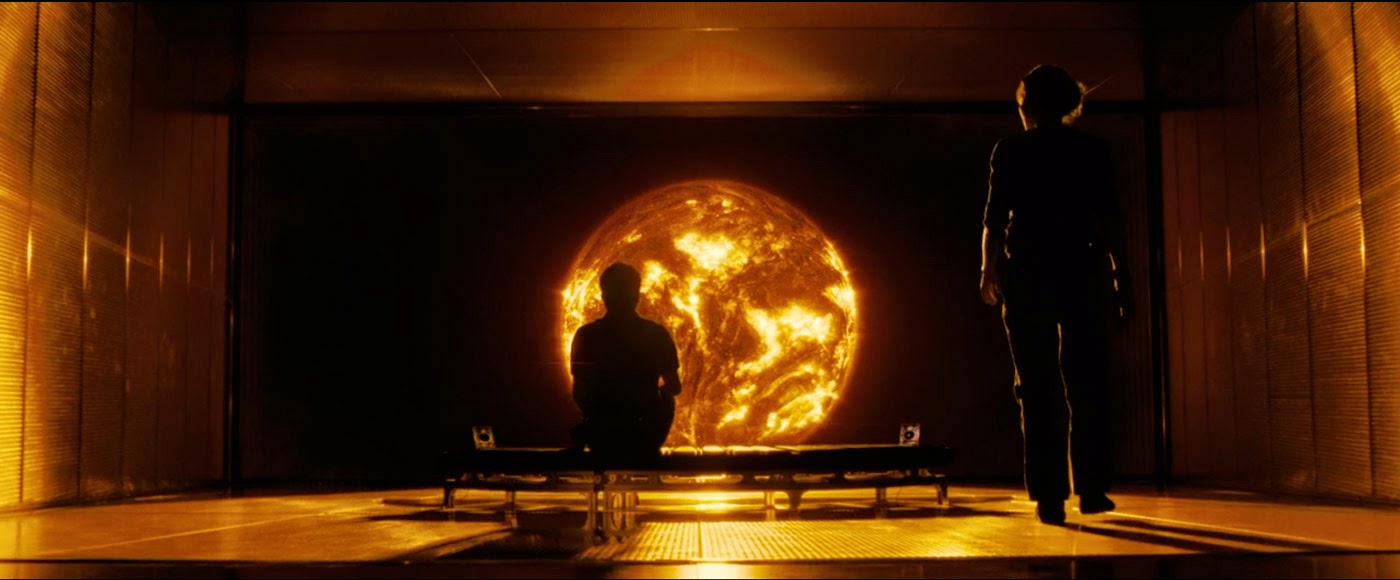
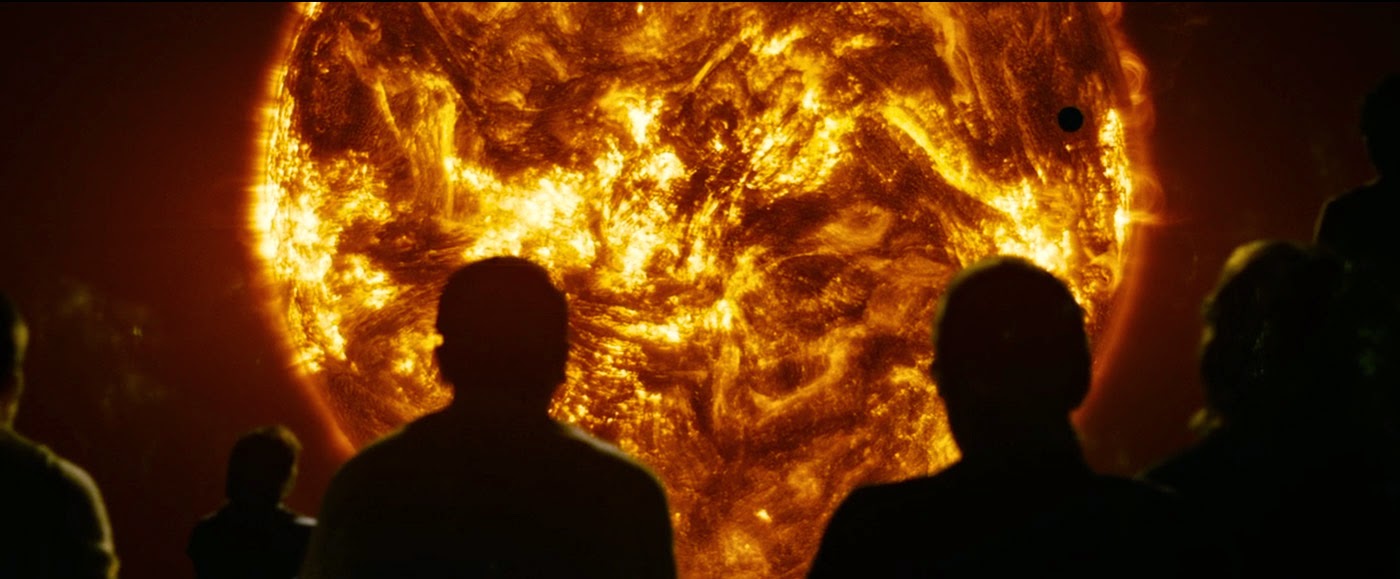
In the last post I talked about physically-based rendering and cubic environment maps, shortly after which I needed to create the transparent, alpha-mapped smoked-glass window you can see in the frame grabs from the movie below:

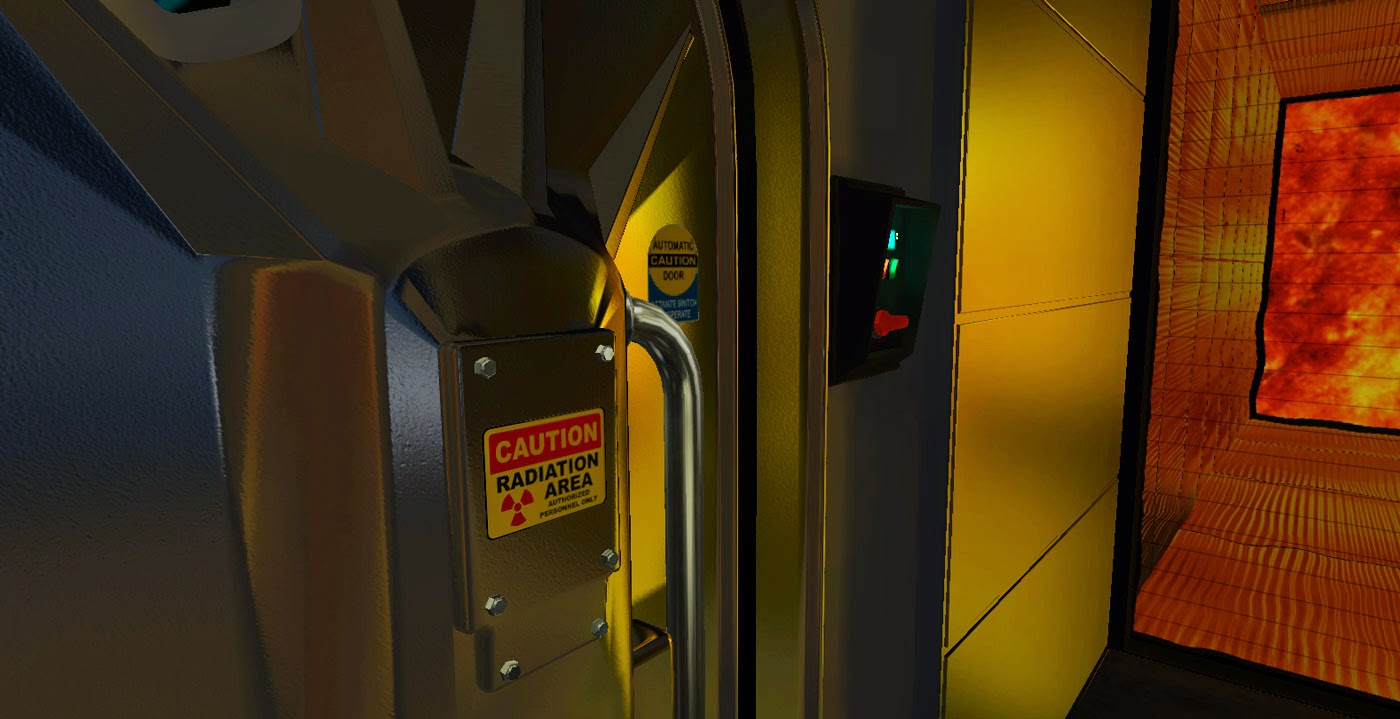
Smoked-glass sliding door screen-left.
More smoked-glass, this time from inside the science lab.
As a new Unity user, [n00b], I had previously switched on deferred-rendering in the graphics pipe [cause it sounded great], only paying scant attention to the documentation mentioning that deferred rendering supports a multitude of dynamic lights. I thought 'Oh yeah, dynamic lighting, that's something I'm going to want for sure', and completely ignored the part that mentions transparent objects must be rendered in forward rendering mode.

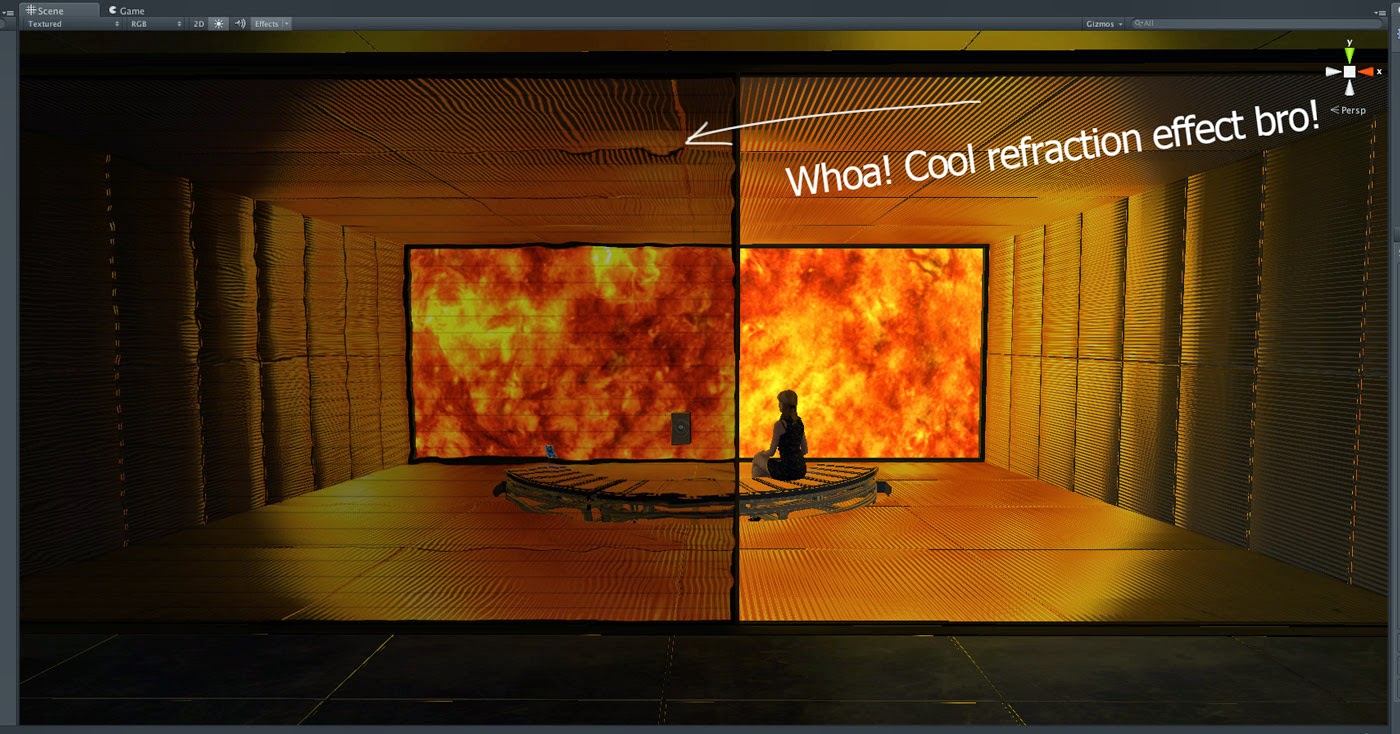
I happily proceeded to create the sliding door geo, apply UnityPro's refractive shader and watch my frame rate plunge down to sub 60fps as I approach the glass.


Oh noes!!! The horror! I resigned myself to the fact that I probably couldn't afford this cool looking effect with my GPU [nVidia GTX 680MX] and swapped the Pro refraction shader for a plain alpha-mapped transparency shader. So sad. However, I remembered that for achieving a sense of presence, Oculus recommend a high frame rate over visual fidelity.

So money. I must have it at all costs.
But when I previewed the alpha-mapped transparency shader in the Rift the frame rate still took a nosedive when I approached the glass. So the transparency itself was the cause of the problem and not the refraction shader? But why should transparency cause such a hit to the GPU?

There are two main problems and the answer lies in the order in which the objects I'm asking Unity to draw are rendered. I risk stuffing both feet in my mouth trying to explain this as I do not have OpenGL coding experience nor a computer science background, but here goes a quick summary. And here's a link to a great page describing both forward and deferred rendering modes if you'd like more info.

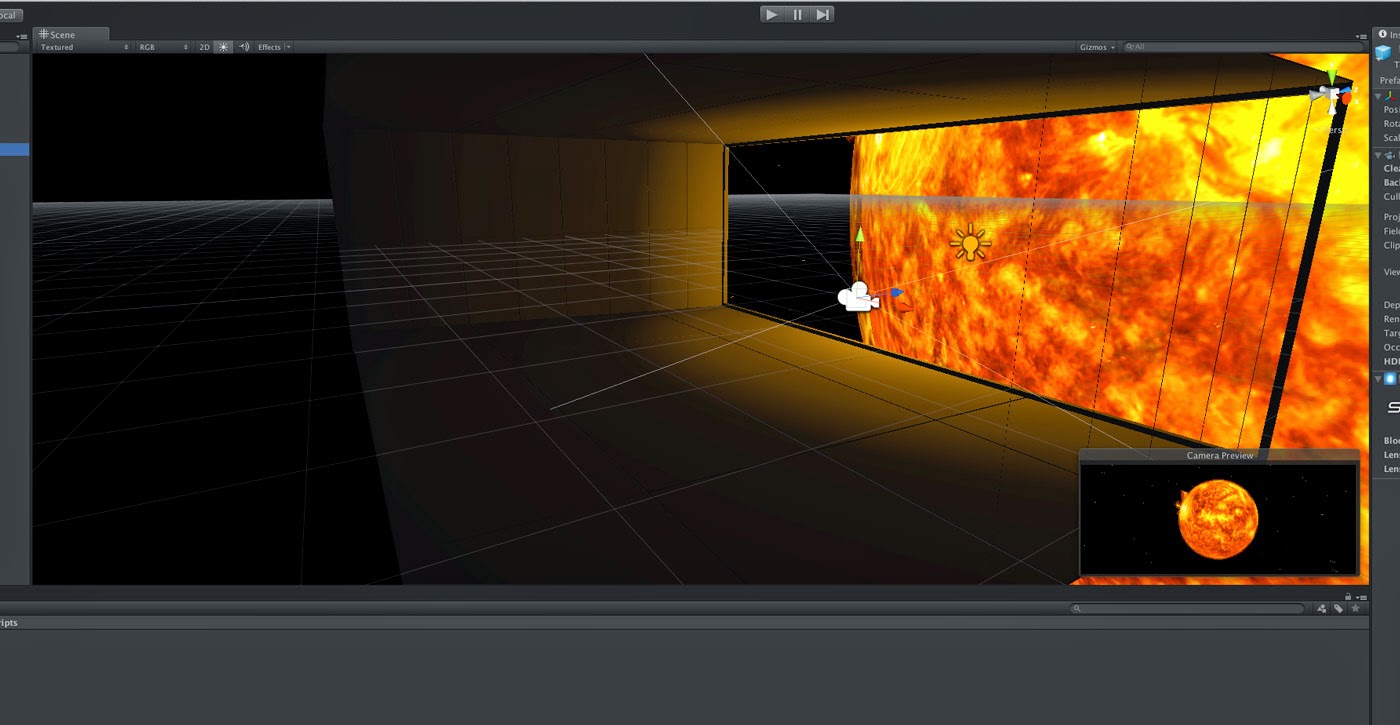
To draw the current frame, the GPU usually attempts to draw the objects in the scene from the furthest object visible all the way up towards the front, or what is nearest to the camera. This is good because objects are sort of stacked logically and things appear in the correct order depth-wise, but this is also bad because things that might be hidden by other things are drawn unnecessarily, wasting GPU resources. This is the first problem. This unnecessary drawing is called 'overdraw' and in fact Unity has a viewport mode dedicated to showing you what's hiding behind other things:

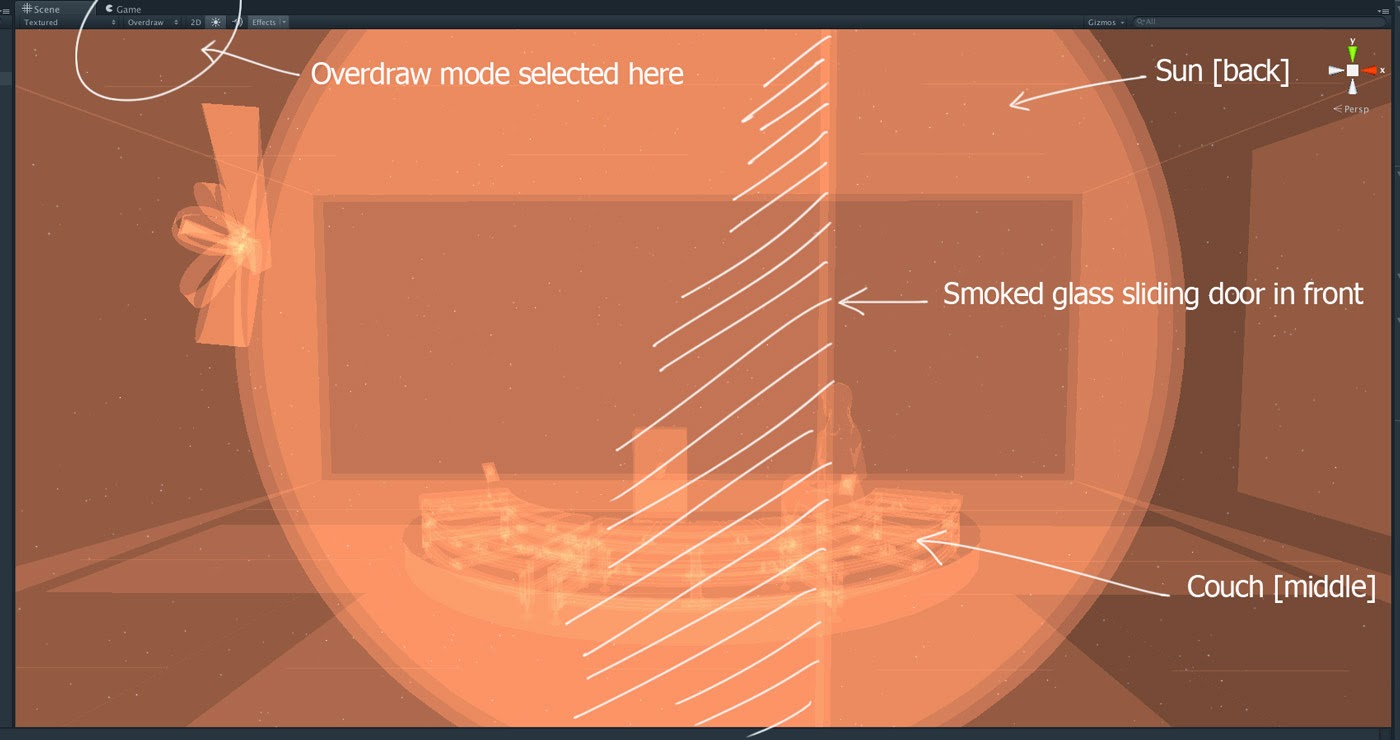
Unity's Overdraw viewport mode - How to know what is transparent and what is not though?
Smart video game design attempts to minimise this by culling or removing objects that are hidden behind others so the GPU never needs to draw them. I'm not being that efficient yet however and just relying on not having too much stuff to draw. We're in space after all. This doesn't really impact the base rendering speed *too* much, but it's part of the overall problem.

The second part of the problem is that I'd asked Unity to draw in deferred rendering mode, where the geometry is processed in multiple passes to separate the jobs of drawing, lighting, texturing the scenes objects. In that lighting pass - and this is the main advantage of deferred rendering - many many lights can contribute to the scene's illumination cheaply as there's no texturing or other stuff done at that time, hence you can have lots of dynamic lights. But during the remaining texturing and compositing phase of the draw the transparent portions of the foreground objects must be considered when calculating the pixel sample values of the objects behind. And it's this continuous checking and sampling that destroy any speed gains made. The glass and the way it's transparency contributes to the appearance of the objects behind has to be considered at every step. In fact the closer you get to the glass, or the more of your view covered by it, the slower the GPU goes.

Forward rendering however, performs this object drawing from the back up to the front also, but it draws, lights and textures the scenes objects as it goes. Each object is rendered in it's entirety and then the next closest etc etc on and on until right in the front at the last millisecond the transparent glass is drawn over the top and BLAM that frame is done. It's this brute force approach that makes transparent foreground drawing feasible.

Sure enough, switching Unity to forward rendering instantly restored my frame rate, and allowed me to use the refractive shader which looks cool. It's a little over the top as glass on a spaceship this modern probably has no imperfections at all through which the background would be distorted but I think it adds to the ambience. And since my scene is mostly static, I was able to bake any shadow casting lights and extra stuff afforded by deferred rendering into the light-mapping. That's my problem solved!

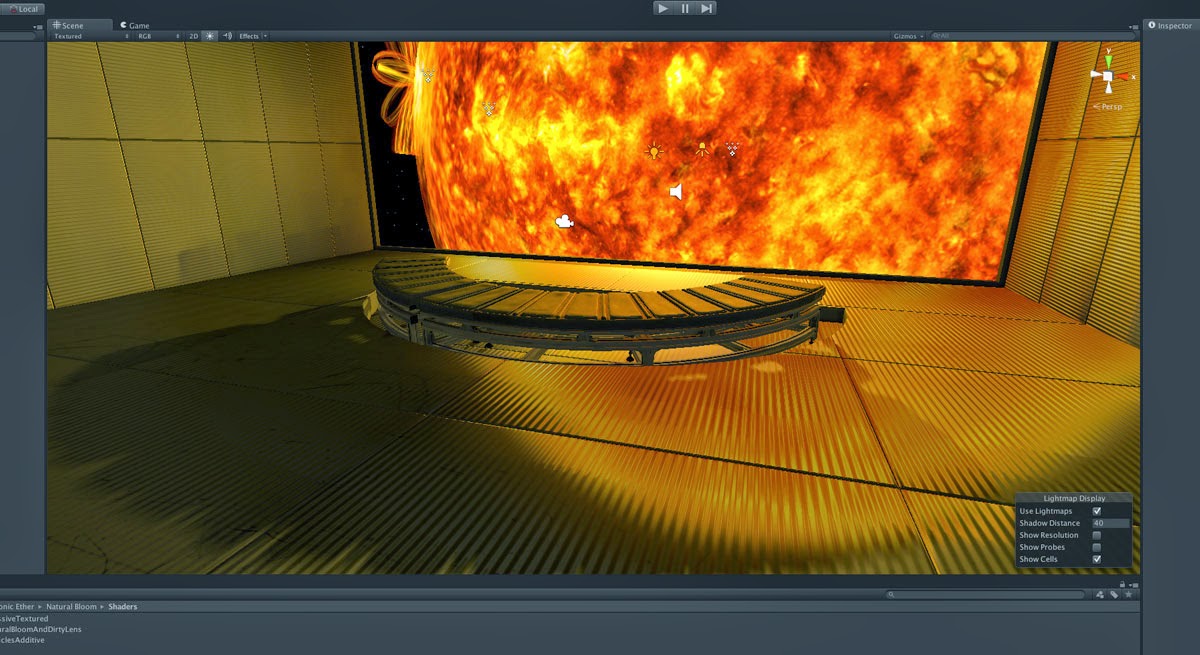
Phew. If you're still here, congrats. Hope that wasn't too painful. And if I got this wrong, don't hesitate to tell me in the comments. Now for some screen shots of where the observation deck is at.

EDIT: Here's a great read/rant from a graphics programmer about the different rendering styles as well as a discussion on why it's hard to make mirrored surfaces in games: http://www.reddit.com/r/gaming/comments/12j1jn/

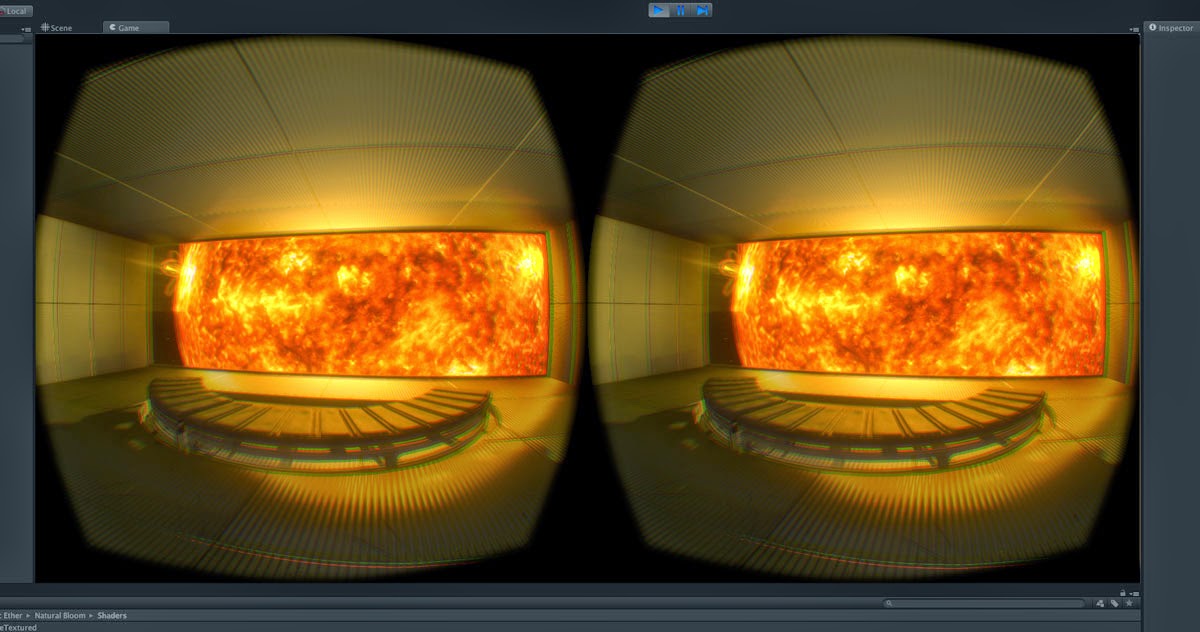
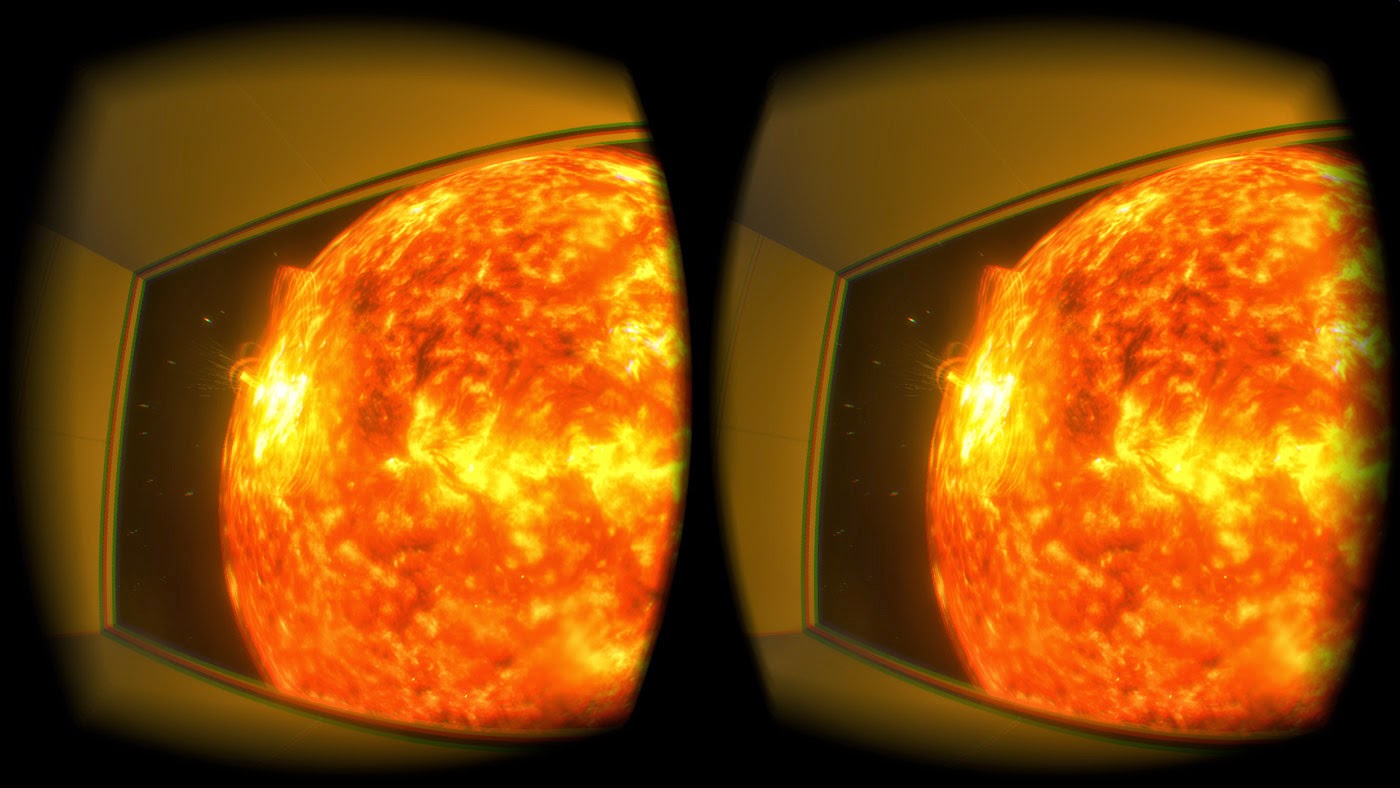
Please bear in mind the following images lack the optical effects present in the Rift's view which assist dramatically in creating the missing atmosphere. But the double imaging of the Rift screen make it tough to see what's there, so this is how you can see it for now:

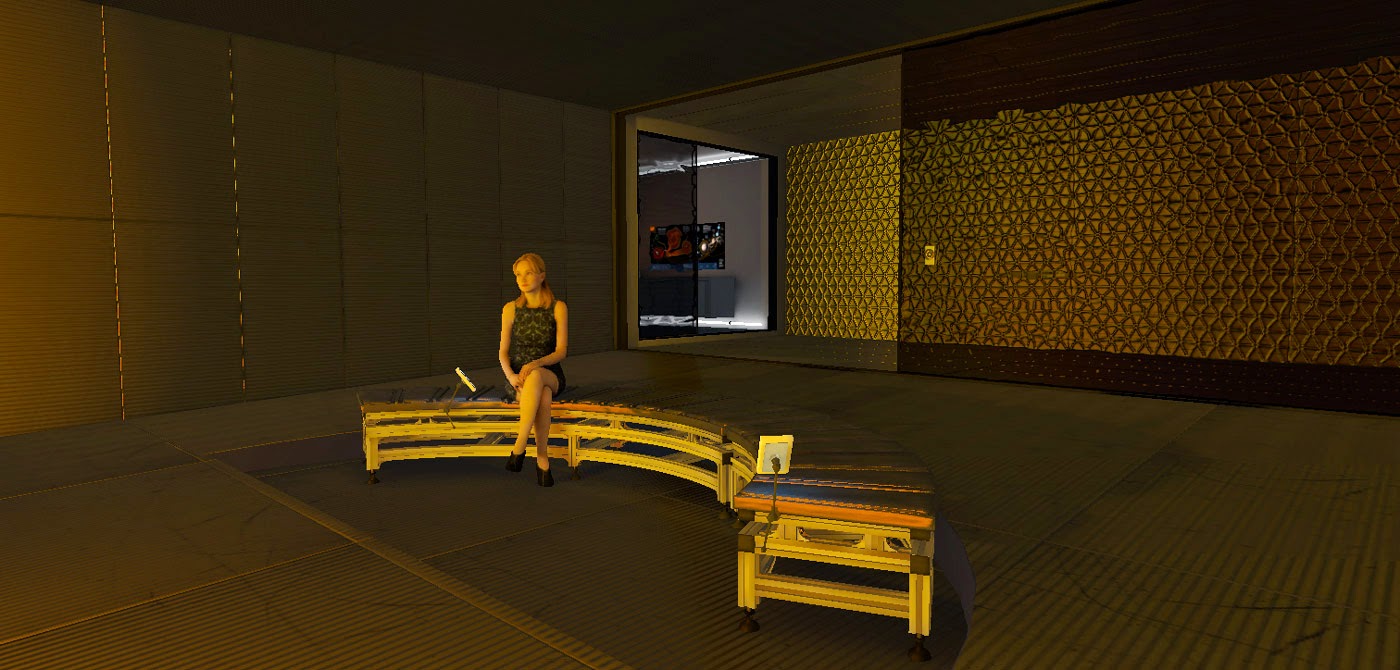
I found a free, high-quality model of a seated woman online to share the viewing couch.
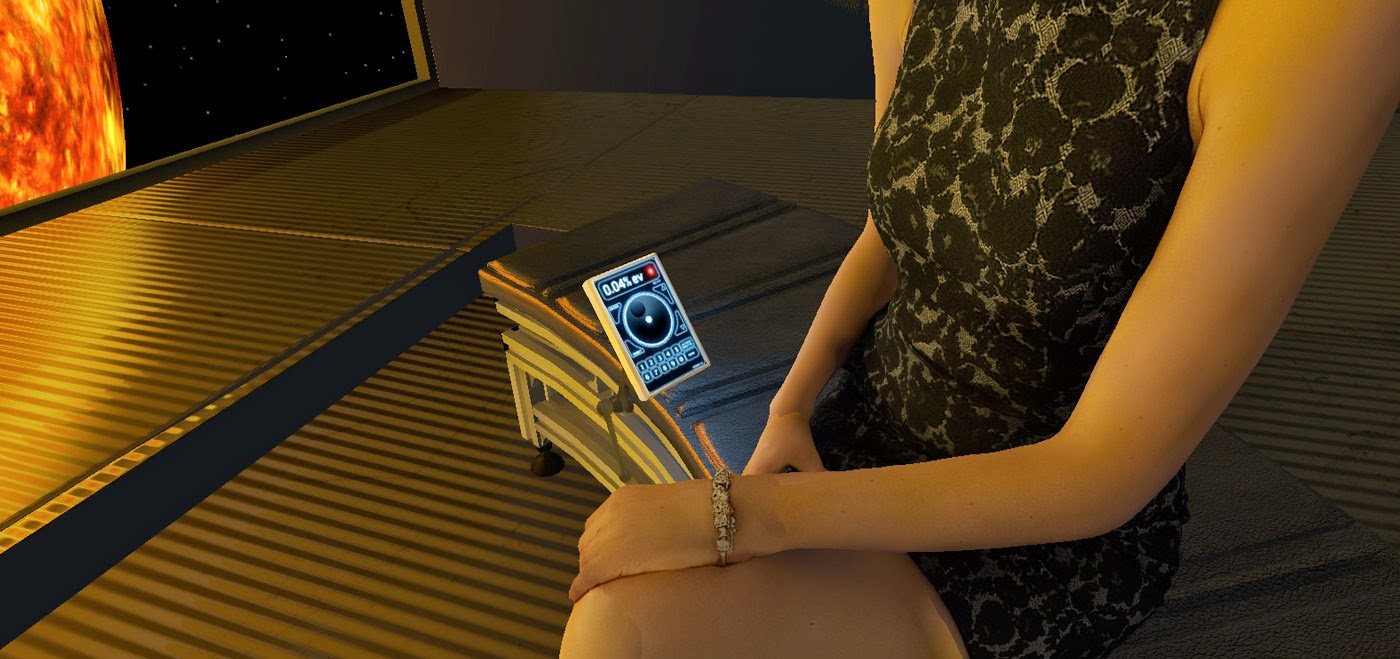
Viewing deck exposure controls are present. 
Rear corridor hatch and controls.
Rear wall normal-mapped panelling.
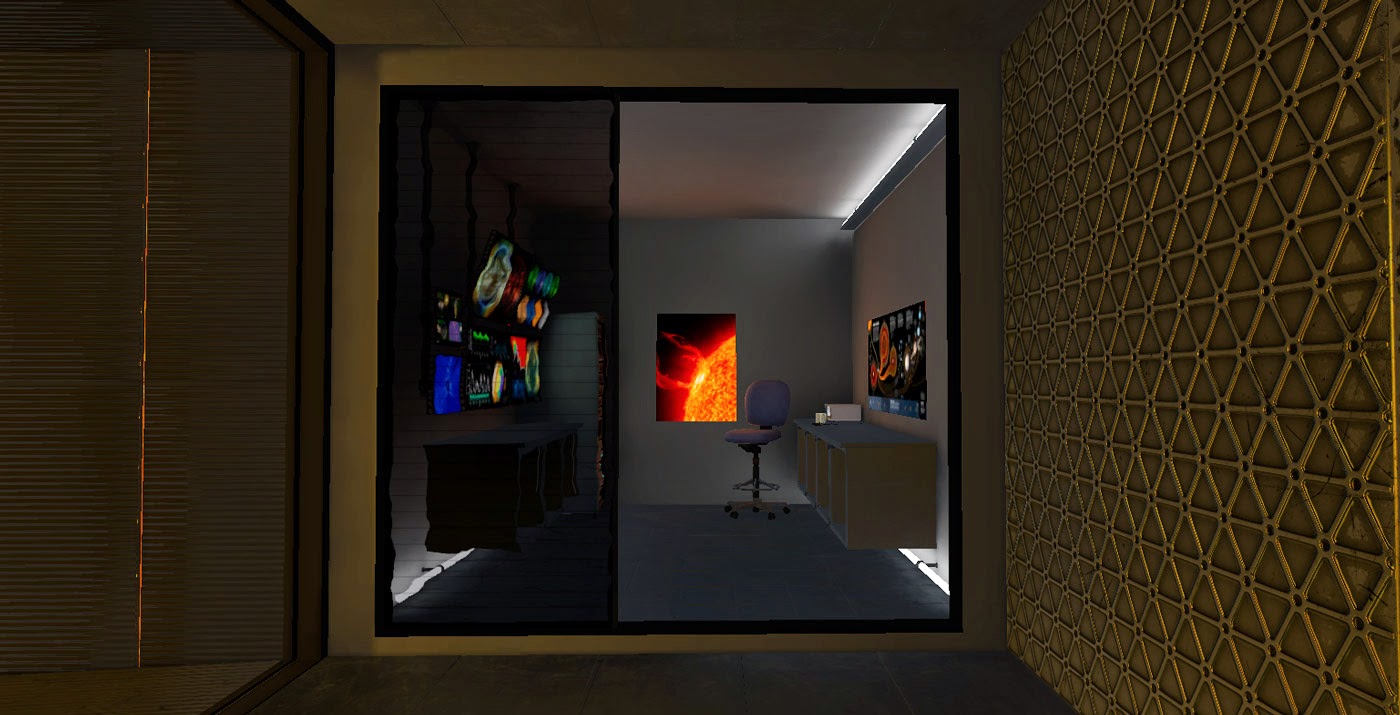
Science lab doorway.
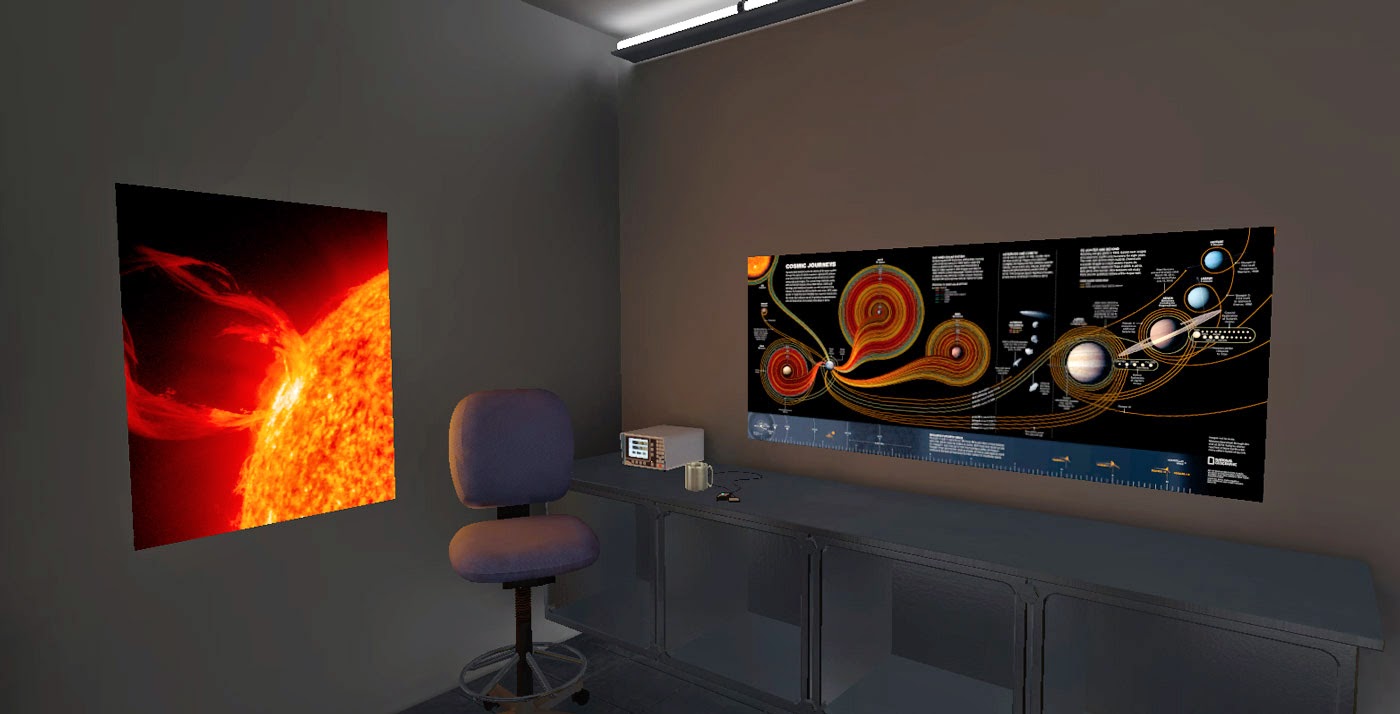
Ergonomic chair. On a spaceship. Of *course* it's ergonomic. Who'd send an un-ergonomic chair into space!?
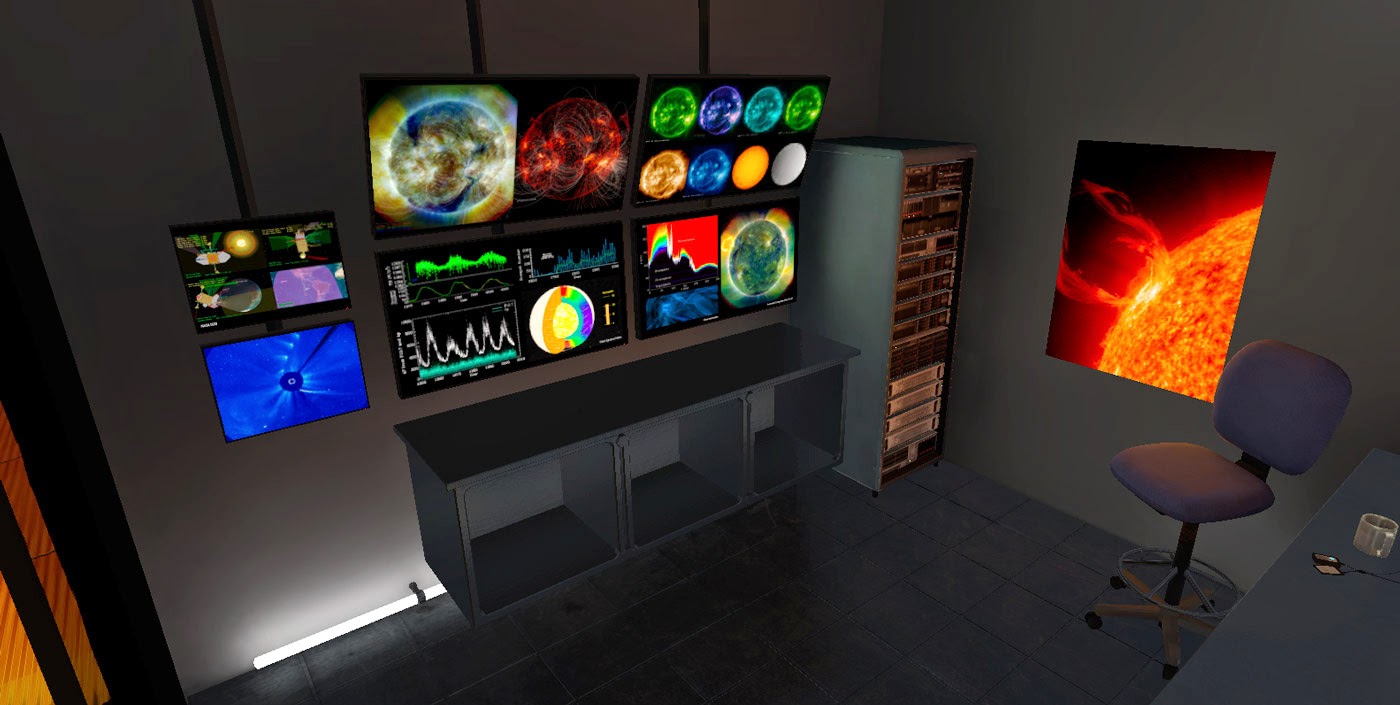
Monitor bank, and [how exciting] a server rack. Blinking lights.
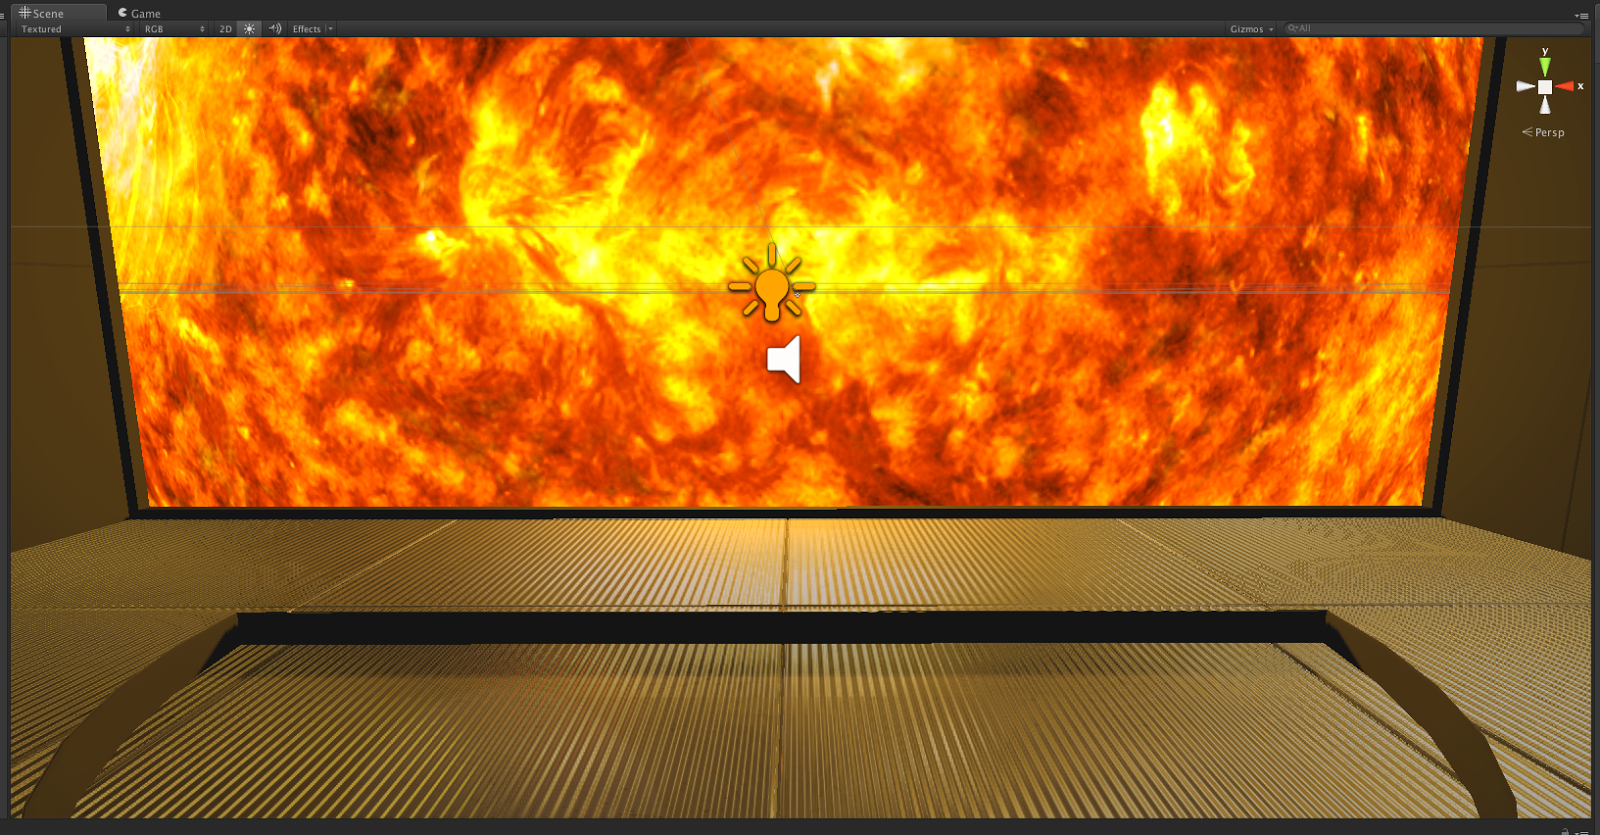
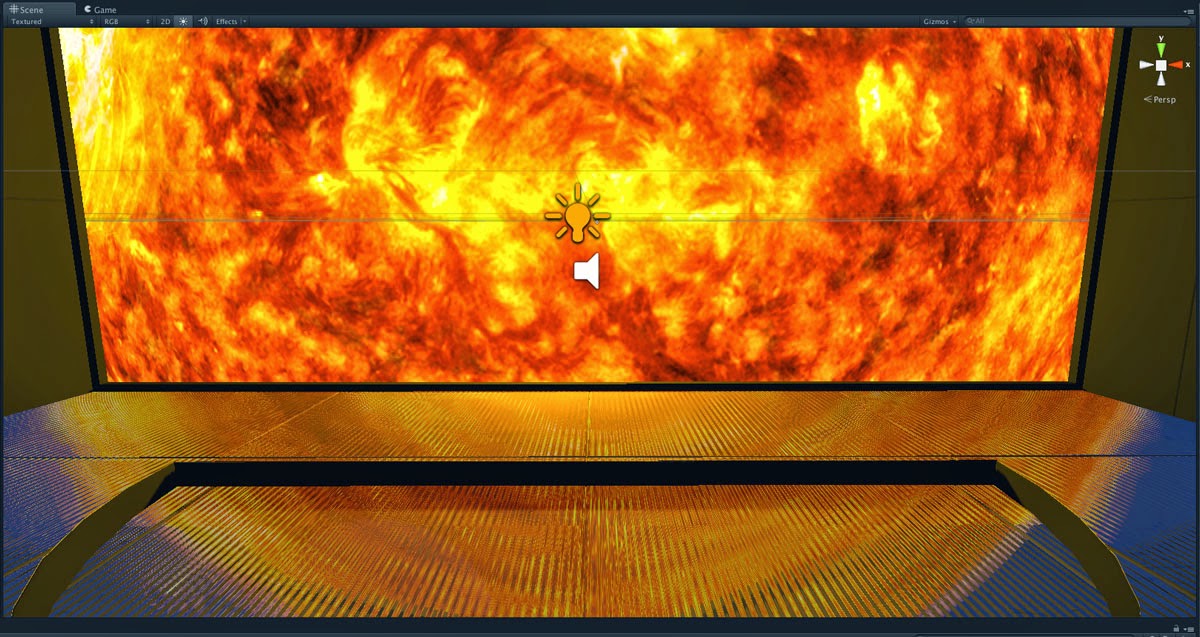
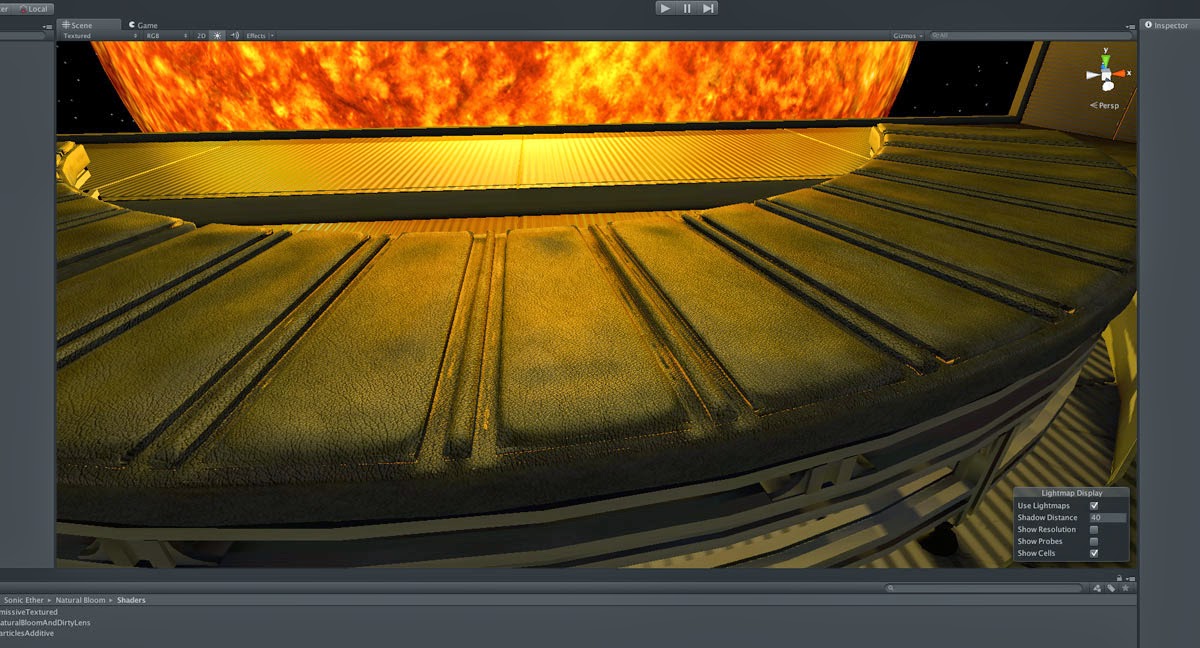
And at this point my goal is to return to detailing and texturing the magnetic flares around the sun and then release the demo to the community. The aim of this demo is to recreate a location from the film as well as offer a relaxing Oculus demo where you can get a tan in VR. I'll probably be spending a chunk of the Wellington winter months in there attempting to offset seasonal affective disorder.

Till next time!

-j

Wednesday, December 3, 2014

Physically Based Rendering, cubemap reflections, parallax correction, light-mapping and more!

So, I feel I've tumbled down some sort of rabbit hole in the last few weeks. What started as an innocent attempt to model a room from movie has transmogrified into a headrush of new learning about the current state of the art in real-time rendering, and thus a fair amount of dissatisfaction with my current abilities. Only to be expected really!

The excellent Marmoset Toolbag in action
Last post I felt like all I needed was some realistic floor reflection cubemaps. Google got me off the starting line with some christmas ornament reflection maps that sorta worked:


Which, when used as a cubic reflection map, produced this sort of look on my floor tiles:
yeah... ish
I discovered that Unity can make these rather easily internally too. By choosing a transform internally near where the viewer would be situated I can render 6 x 90° camera projections that form a box with the images that everything inside that box that was shiny would see. This is great. Now my normal-mapped floor can reflect the sun! Now my own cubic reflection map looks more like this:


Which produces reflections like these:
The actual sun reflecting on the actual floor! I'm done! ... NOT.
But... well... this is all well and good if the floor is perfectly reflective. Which it's not. It should be covered in micro-abrasions that scatter the incoming light rays and making the reflections blurry. How can I create this in Unity? There's no 'roughness' slider in the default shaders and my metal floor is a long way from looking anything like the quality camera-lens renders above.

http://www.marmoset.co/toolbag/learn/pbr-theory
This began my investigation into quality reflection map creation which led me to Marmoset Skyshop for Unity. Marmoset make a fantastic set of shaders for Unity 4.5 and up that aim to mimic the energy-conserving properties of a surface and also provide a really good introduction to physically based rendering. I highly recommend reading their Toolbag2 Learning pages if you don't know where to start. Turns out, realtime rendering and offline rendering have a much larger overlap than I assumed with next-gen game engines requiring the understanding of BRDF functions and forcing artists to re-consider albedo [diffuse] and specular maps entirely differently than the past 20 years.

A little learning goes a long way in improving material appearance.
It seems each time I want to improve the appearance of my scene with Unity's rendering capabilities, I end up trawling the Unity Asset Store looking for 3rd party solutions. And there are a few real gems. However, with the imminent release of Unity5 and it's reflection probes, realtime GI, and new super shaders, is it worth spending any money to gain these abilities now? Perhaps not.

So my choices at this point are begin transitioning my project to Unity5's beta [which I have access to], or pay money to buy solutions that give me these effects now in 4.5 but may or may not be supported or required going forward...

For now I chose to apply what I've learnt to with what I have. PBR theory has really helped me get better results with the current shader controls - for example the leather texture below has baked-in cracks and grain, breaking up the reflections and giving the couch top appearance a much better feel:


Complete with hand sculpted bum impressions.
I'll make the jump to a proper PBR version of this scene as Unity5's tech releases. In the meantime I've started light-mapping the room's illumination to get better ambient occlusion and mood. The viewing couch is modelled and in place and some new shaders created.


A fun model to make with curved metals and a low-ish polycount.
Where O where art thine couch reflections in the floor???
With my current reflection mapping approach, things don't really line up properly as the virtual surfaces that the reflections are mapped to are actually situated an infinite distance away. Thus you can see the sun reflection on the floor screen-left is actually present where the wall reflections should be appearing. This requires a technique known as parallax-correction - something that Marmoset has an excellent solution for, and the fantastic Sebastien Lagarde documents on his blog here. I'm not sure I'll implement a solution for that as there are other things I'd like to move onto in this project.

Optically in the Rift view I've got a new starfield in the background [I realise exposure-wise that stars would likely be well under the sun's brightness and thus invisible, but you know, VR!], some sun shafts creating beams of light, some dust motes floating in the room for a little atmosphere [after playing Alien:Isolation in VR I couldn't help it - the modelling and lighting in that game is a masterpiece!] and a few other tweaks in store.


It's a place you can go and just sit and look at the sun.
Still hitting 75fps no problem at all in OSX and Win7 so I'm not really near the limits of my GeForce 680MX yet. Speaking of which, the current OVR 4.3.1 runtime and Unity integration produce rock-solid head-tracking in Windows and it's kinda stunning. OSX is still a little swimmy. Getting close to producing a youtube clip [maybe 60fps?] for people to try out too. 

I'll wrap this up now, but next post I want to detail what I've found out about timewarping, prediction alpha transparency, forward rendering Vs. deferred rendering and the Unity Pro Profiler, and of course some scene updates. 

Looking for where this began? Click here to visit the beginning.

So long for now!

-j

Tuesday, November 11, 2014

Game dev, realtime rendering and the Oculus Rift in my fan tribute to the movie Sunshine

I've been experimenting with the Oculus Rift DK-2 in Unity for some months now. It's incredibly fun to make a place from an idea you have and then go and visit it virtually. It literally keeps me awake at night when I have a moment of inspiration about something new I could try and then get all excited about how to bring it to life.

Most recently I've started creating a bit of a tribute to the movie Sunshine. I really love the solar observation deck depicted near the start of the film:

Sometimes it's small, sometimes it's big.
Cliff Curtis asking the sun just how many characters of different ethnicities he can get away with playing.
Characters on the ship spend time in this portal just gazing at the sun as they head towards it in their ship [to blow it up of course. I'm not kidding BTW]. And for the first two thirds of the film it's as though the sun is a character in the movie - the main protagonist almost. As for the last third, well you'll have to watch it to see.

I thought this might be a suitably contained idea to learn some realtime rendering skills and game dev abilities. I'm choosing not to focus on interaction so much as art direction. I'm aiming to make a place where you can just go and sit quietly for a while and watch the sun like the characters in the film did.

Along the way to this I've had the rude-awakening of just what realtime rendering means and how much we are unconstrained and sort of lazy in the film VFX world. In VFX if something takes even 24 hours to render, well, that's kind of ok because the end result should be amazing right? Well in games the goal is often to pull off stunning visual complexity 60, 75 and up towards 120 times per second. And often on hardware that lags behind the sort of computing power available to me at work.

Another cool moment where the crew gather to watch Mercury transition across in front of the sun.
I'm developing on OSX on a 27" 2013 Apple iMac with an nVidia 680M GPU with 2GB RAM. I do not have a 980GTX sadly. Although I'll be testing builds in bootcamp in Win7, I'm creating and compiling in OSX because my main DCC toolsets are there at the moment.

To do this, every aspect of scene creation needs to be efficient. Absolutely NOTHING that does not need to be computed should be:

Extra faces/verts/edges on your model that are not contributing? Get rid of them.
Small modelled-in details that could be represented more efficiently in a map? Map it.
Extra lines in your shader doing nothing? Get rid of them.
Extra geometry being transformed around that you can't see? Get rid of it.
Using the similar shaders on multiple different objects? Make it one. Make them all one!
Fancy looking particle collisions you can't see and don't really add much? Get rid of them.
Amazing post-effects bringing your framerate down? do you REALLY need them?

This approach really forces you to consider economies that impact art direction. How fast are procedural textures when you could paint a map? Do you really need to see all the curvature on the edge of that seat you won't get close enough to see if it's costing you 1 FPS? No. So it's a bit of a change from my day job at Weta.

So right now I've pretty much just got the sun, some flares, some particles, some observation lounge geometry and that's about it. But I also have 75fps on my 680MX on OSX so that's a good sign too. And given the current state of the Oculus SDK and runtime [4.3beta], I should be able to continue to get a decent framerate in the future and definitely a speed boost under Win7. The screenshots below are very work in progress and do not represent the final appearance of this demo.

My sun at the moment, slowly spinning, painted with map data from the Solar Dynamics Observatory.
Just like Minecraft, only hotter.
And of course in the Rift, looking out at my first attempts to paint the solar flare shape textures.
Here's some of the things I'm aiming to include in the final version:

* Have a viewer-controllable exposure facility so you can radiate yourself should you wish.
* Key music from the movie soundtrack - or ambient ship thrum noise.
* Viewer-triggerable Mercury transition.
* Heat-haze effect to depict the atmosphere in the viewing lounge.
* Sun-shaft optical effects.
* A seated figure with mirrorshades on so you can share your epiphanies. [Paging Cliff Curtis to the solar observatory deck]

Like I said, I'm not planning to focus much on interaction with this one just atmosphere really. But I'm having a blast steadily solving problems one after the other and learning classic game tricks to speed things up.

A couple of tools from the Unity Asset Store I'm using include Sonic Ether's Natural Bloom and Dirty Lens, and also ProFlares [which needs some Oculus compatibility updates].

Next up on my list is HDR cubic environment maps and physically-based rendering.

So much to learn. So many ways to screw up ;-)

-julian


Saturday, March 8, 2014

Night Vision Goggles


He said it was the best thing I ever gave to him.

They're not real military grade, but they work. They came with the Prestige Edition of Call of Duty - Modern Warfare 2 [I did not buy that, I bought these from a friend at work].

-j

Saturday, February 22, 2014

Lego Downhill Derby at the Ribble Street Races.

Jamie and Isobel on the course, getting ready to run.
This year as part of the Island Bay Festival, the Ribble Street Races held a Lego Downhill division. Jamie and I could not resist taking part, especially as we felt that the use of my old lego from 1980 had wheels in it that would trounce the competition.

Click here to jump straight to the photo gallery.

I still own most of the parts of this Lego Technic 8860 kit from 1980 - thanks to Mum and Dad for keeping hold of this for me!


So a week ahead of schedule we got down to work. We drew up a cheat sheet of what we felt were the main issues: terrain and hill gradient, wheel choice, centre of gravity and vehicle weight.

Secret plans, secret plans... plot, hatch, scheme.
Here's what we came up with, the main concept being a very low centre of gravity, and being fast and mean [so mean in fact that during the test run we rode roughshod over another vehicle monster-truck style - oops! Oh well, mess with the bull, get the horns I always say]. Check out the gallery for more images.

Say hello to 'Old Skool - 1980'. All your race R belong to US.
There was a huge variation in designs, with everything from boats [on wheels] and tanks to monster trucks and small nimble things that went fast but deviated off course very quickly. Jamie and I quickly found that our creation took it's sweet time to get up to speed, but then went relatively straight and became somewhat unstoppable.

The main race stipulations being that your entry had to fit within a 40cm cubic dimension. All parts must be actual lego. No adhesives or extra weight to be used or fitted internally. Your vehicle MUST be able to transport at least one Lego mini-figure. Didn't say nuthin' about having THREE mini-figures.

Helms-man, Navigator and Psy-Ops.
Sweet, forgiving asphalt. Not the usual stone-chip NZ road surface.
For Glory! ... and a smash up at the end
First look at some of the competition.
Heat two for the open class, Jamie gets a last minute tip on direction from a race official.
City Arts Manager Martin Rodgers from the Wellington City Council doing a great job on the mic.
Unorthodox Death Machine on the loose!
We managed 2nd place in the Open Class! [open cause if you had grown up help you couldn't enter in the younger age-brackets]. For Great Victory!! Here's Jamie on the podium letting the crowd in on a few secrets of our success:


We won video rental, dessert pizza from Hell.co.nz and a nice ceramic mug. Congratulations to all the well-deserved wins in the other divisions, [you can see more of the winners in the gallery] and well done Island Bay for hosting Wellington's very first Lego Downhill Derby.

Next year I think I'll take a more back-seat stance and have our kids build and enter their own vehicles now we know the lay of the land. We've got a heads up on next years design already.

-j